Diaspark Retail Software
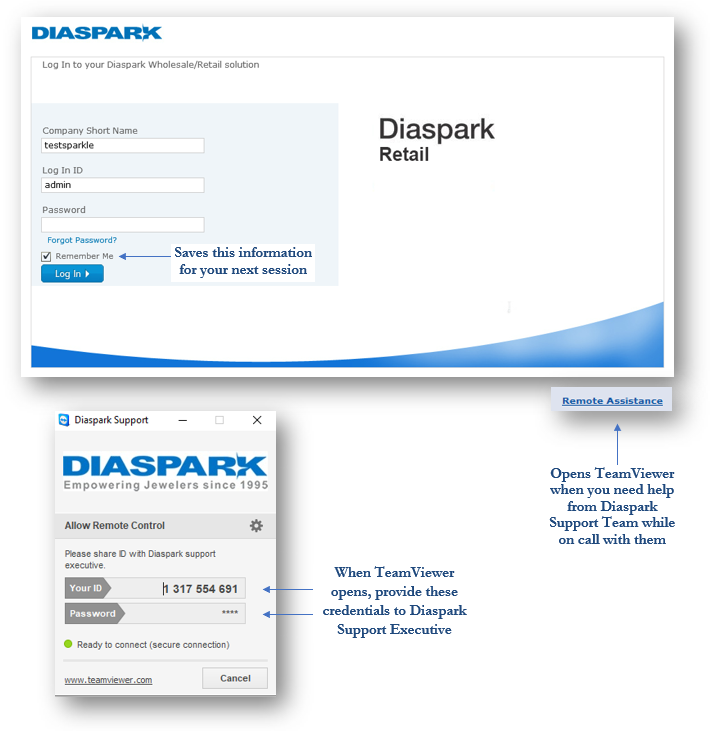
How to Log in to Diaspark Retail
Enter your information into the following fields:
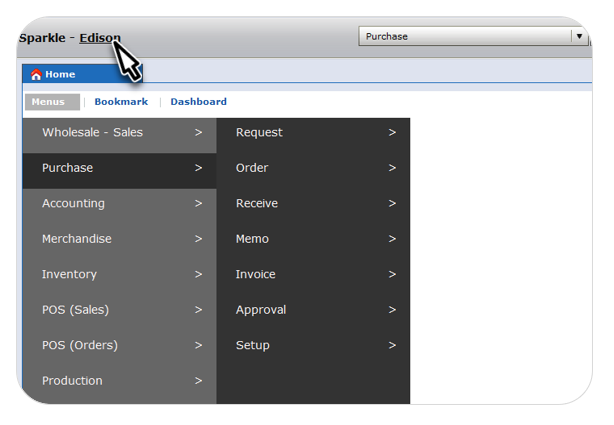
Overview of the Home Screen
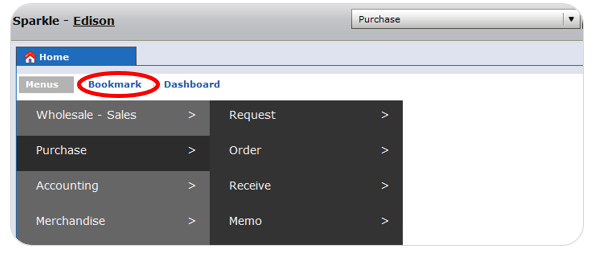
There are twelve modules – wholesale - sales, purchase, accounting, merchandise, inventory, POS (sales), POS (orders) production, diamond, gold, CRM, and setup, as shown below. Click any module to reveal its submodules so that you can view a transaction or perform an operation.

How to Change Current Store to another Store
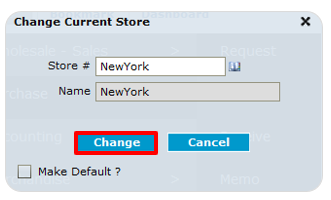
On the Home Screen, on the top-left corner of the screen, click the store location.
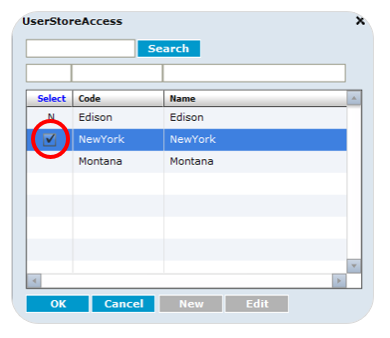
Click the lookup icon to display a list of stores.
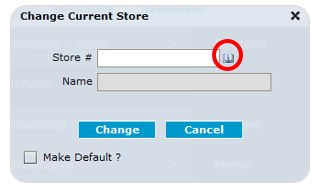
Select the store you want to change the current store to, and then press OK.
If you wish to make this your default store, select the “Make Default” checkbox. Then, click the Change button.
How to Bookmark Modules
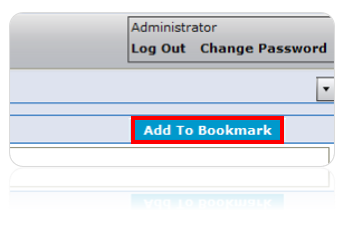
To bookmark your significant or most frequently used modules, click the “Add to Bookmark” button on the top right-hand corner of any module’s screen after its window opens up.
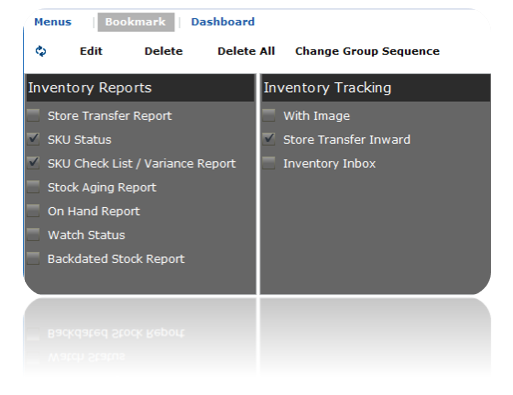
To find your bookmarks, on the Home Screen, click the Bookmark tab.
Here, you can group modules into different categories based on your preferences.
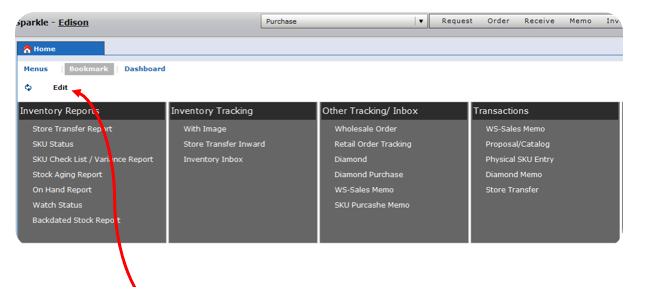
Click to edit modules from certain groups or change the sequence.
Then, select the checkboxes and click delete to carry out the operation or delete all.
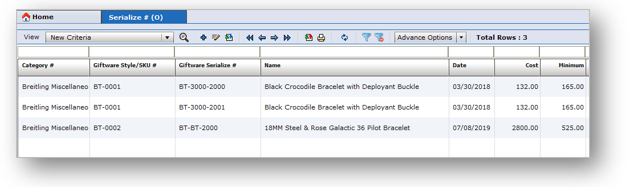
How to Search for & Filter Information
Each screen will display different search methods depending on its functionality. Generally, at the top of the window, you can:
- enter several characters into the blank white fields that serve as a reference point to find similar words or relevant information
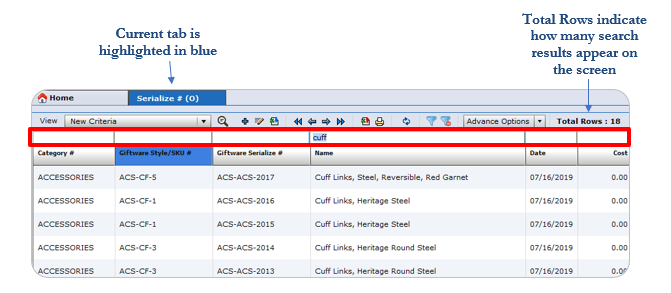
- click on any bolded category to sort the data by alphabetical, ascending, descending, or numerical order.
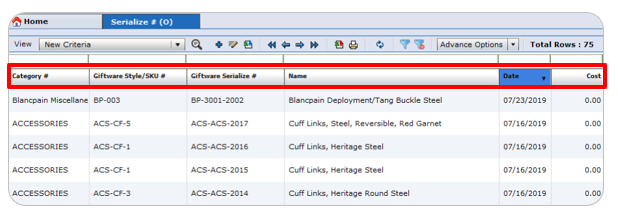
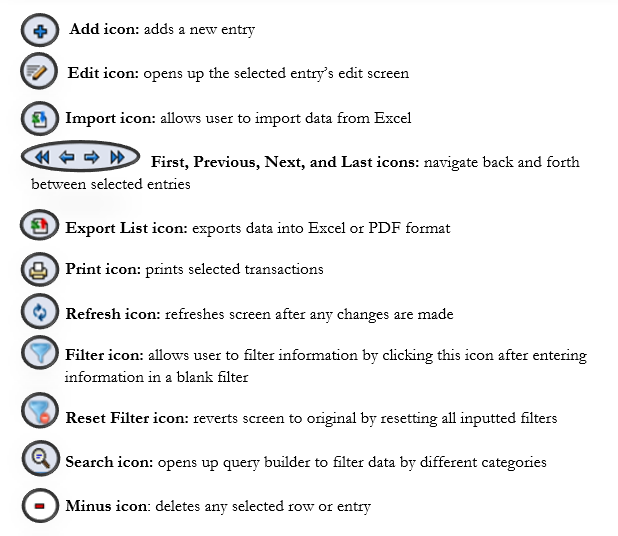
There are also several icons that appear at the top of each screen.
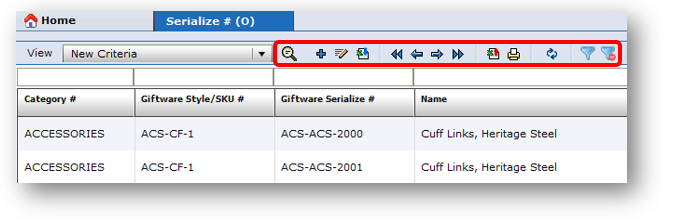
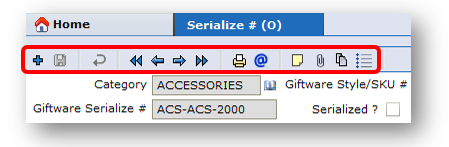
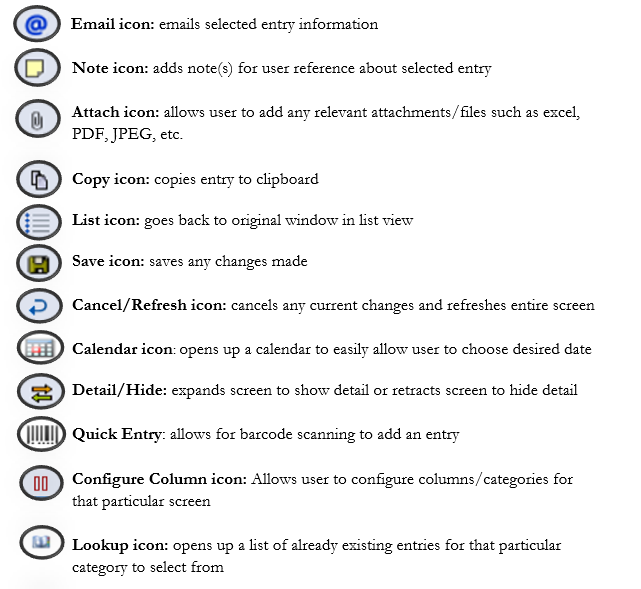
There are also several icons that appear on entry modification screens. They will enable/disable automatically depending on the screen’s functionality:
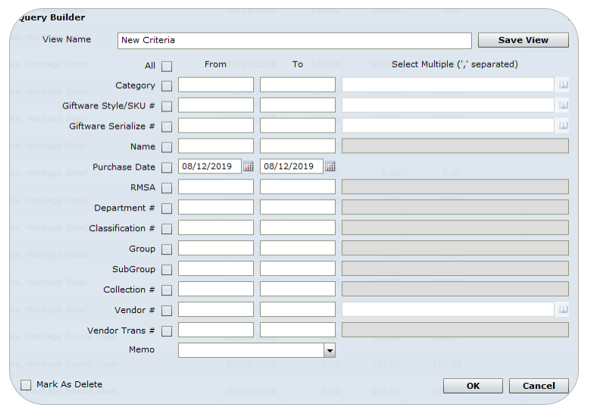
How to Use the Query Builder
The Query Builder allows the user to lookup and filter data by various categories, and allows the user to save any manually created filter. It can be opened up by clicking the search icon on any screen.
To disable all of the fields, check the All checkbox.
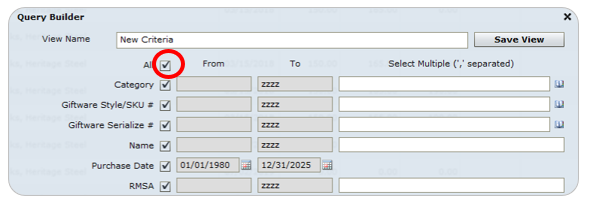
Then, uncheck whichever category you would like to filter the data by.
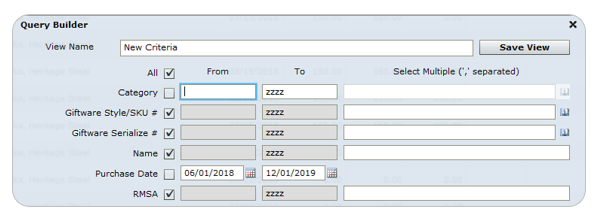
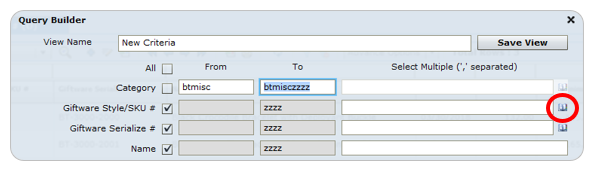
Enter information into the From field, and then click the corresponding To field. Then, click the OK button at the bottom. You can also click the lookup icon next to each row.
Then, all of the information that fits the criteria that you entered will appear.